Showing posts with label Santa. Show all posts

Sunday, November 23, 2014

Quick Gifts for Christmas

Aprons Make the Perfect Gift

There's still time to make special gifts for Christmas giving. Here are a few from my pattern store at www.craftsy.com to check out.

Looking for a quick-and-easy apron for kids? Check out my Little Helper's Apron. It requires minimal yardage and time. Choose just the right fabric for each child on your list to make them extra special. The choices are endless at you favorite quilt shop. I suggest you preshrink your fabrics before sewing, as these aprons will get lots of use by little cooks and crafters.

 If you have machine that embroiders, choose lighter fabrics and  add a favorite design to the bib portion of the apron.


Here are two more apron patterns from my Craftsy store to make for yourself or for gifts this holiday season. A Holiday Apron for Mrs. Santa Claus is an adult-size, one-size fits most pattern. It's all dressed up with fancy buttons and a pretty belt buckle...perfect for those days when the hostess must be in the kitchen.

If you love to embroider, my gingham Jingle Trees Apron with tickle your fancy. My grandmother made these in the 1950s for church bazaar fundraisers and I inherited one from my Mom. Simple cross stitching on gingham was popular then. 

Make one for yourself and for other hostess on your gift list. If you don't have time to stitch right now, you'll love having this pattern on hand to start your stitching for gift giving next Christmas!
You can use it to teach a child to embroider too.

Tiny red ribbons and jingle bells adorn the top of each tree and rickrack is stitched in place below the tree trunks.

 Mug Rugs...Fun and Quick to Sew for Gifts

Have fun stitching up your favorite mug rug from my Santa and His Helpers Mug Rug pattern. They require small amounts of fabric, and you might have just what you need in your scrap basket or fabric stash. Make in sets of 3 like those shown or make a set of your single favorite design. Mug rugs don't take much time to make and are wonderful gifts. Or, you can turn them into mini wall hangings or large ornaments by adding a ribbon to the upper edge.


 And here's a fun set to make for your favorite Yoga teacher...The Yin and the Yang of It! Applique two pieces to each one, quilt and bind, and you'll have a set finished in no time!

 Or, for someone you love, choose Owl Always Love You or Here's My Heart Valentine Mug Rug. These make great gifts for Christmas or for Valentine's Day.


So, time's a wasting. Choose your favorites from this array of simple projects and enjoy the process as you make special gifts for the ones you love!
Until next time,
Keep on sewing and smiling!
Barbara

Monday, November 11, 2013

The Trouble with Quilted Mug Rugs...

Just like you can't eat just one potato chip, you can't make just one mug rug. They're fun, cute, easy, and quick to make. I was a little late with Halloween so I bypassed Thanksgiving (for now) and skipped right on to Christmas. With over eight new designs from which to choose, I settled on making my three favorites and have grouped them together in a single pattern. Check out Santa and His Helpers at my craftsy store: http://www.craftsy.com/user/153303/pattern-store

 Santa & His Helpers


If you prefer, the mug rugs can become oversize ornaments or package gift tags by adding a ribbon tie to the upper edge as shown in the photo of Rudy' Red Nose, above right. Or, if you use a muslin backing to cover the batting and the quilting stitches, you can write a holiday message on the back and add other "artsy" embellishments with stamping, doodling, etc. Pop them in envelopes to send to friends who will appreciate your handiwork.

Simply Santa is just that--really simple to stitch up in a hurry. Use poly felt for the beard, mustache, and hat trim and do free-motion quilting in the beard to simulate Santa's curls. For his hat, choose two red fabrics to help differentiate the two pieces. Add a white pompom to the tip of the hat.


Rudy's Red nose, as shown, is an applique enhanced with a flat button. When adding embellishments, make sure they won't interfere with your mug, if you're planning to use these as mug rugs.


Alfie the Elf looks like he's a little unhappy--maybe he's a little overworked! It's all in the shape of the mouth! Make it smaller and turn up the ends a little more when you stitch his mouth for a cheerier demeanor. Flat buttons replace appliques on Alfie's hat and shirt.

All three mug rugs are set up for fusible applique. The pattern includes full-size applique placement guides and reversed images for fusible applique. Use up scraps and cut into your fat quarters for these fun mini quilts. They are wonderful scrap buster projects and give almost instant gratification.

Set yourself up to sew multiples and you'll have a set or two done in no time. Check out the section on Assembly Line at a Glance in the pattern. 

No Time Like the Present...

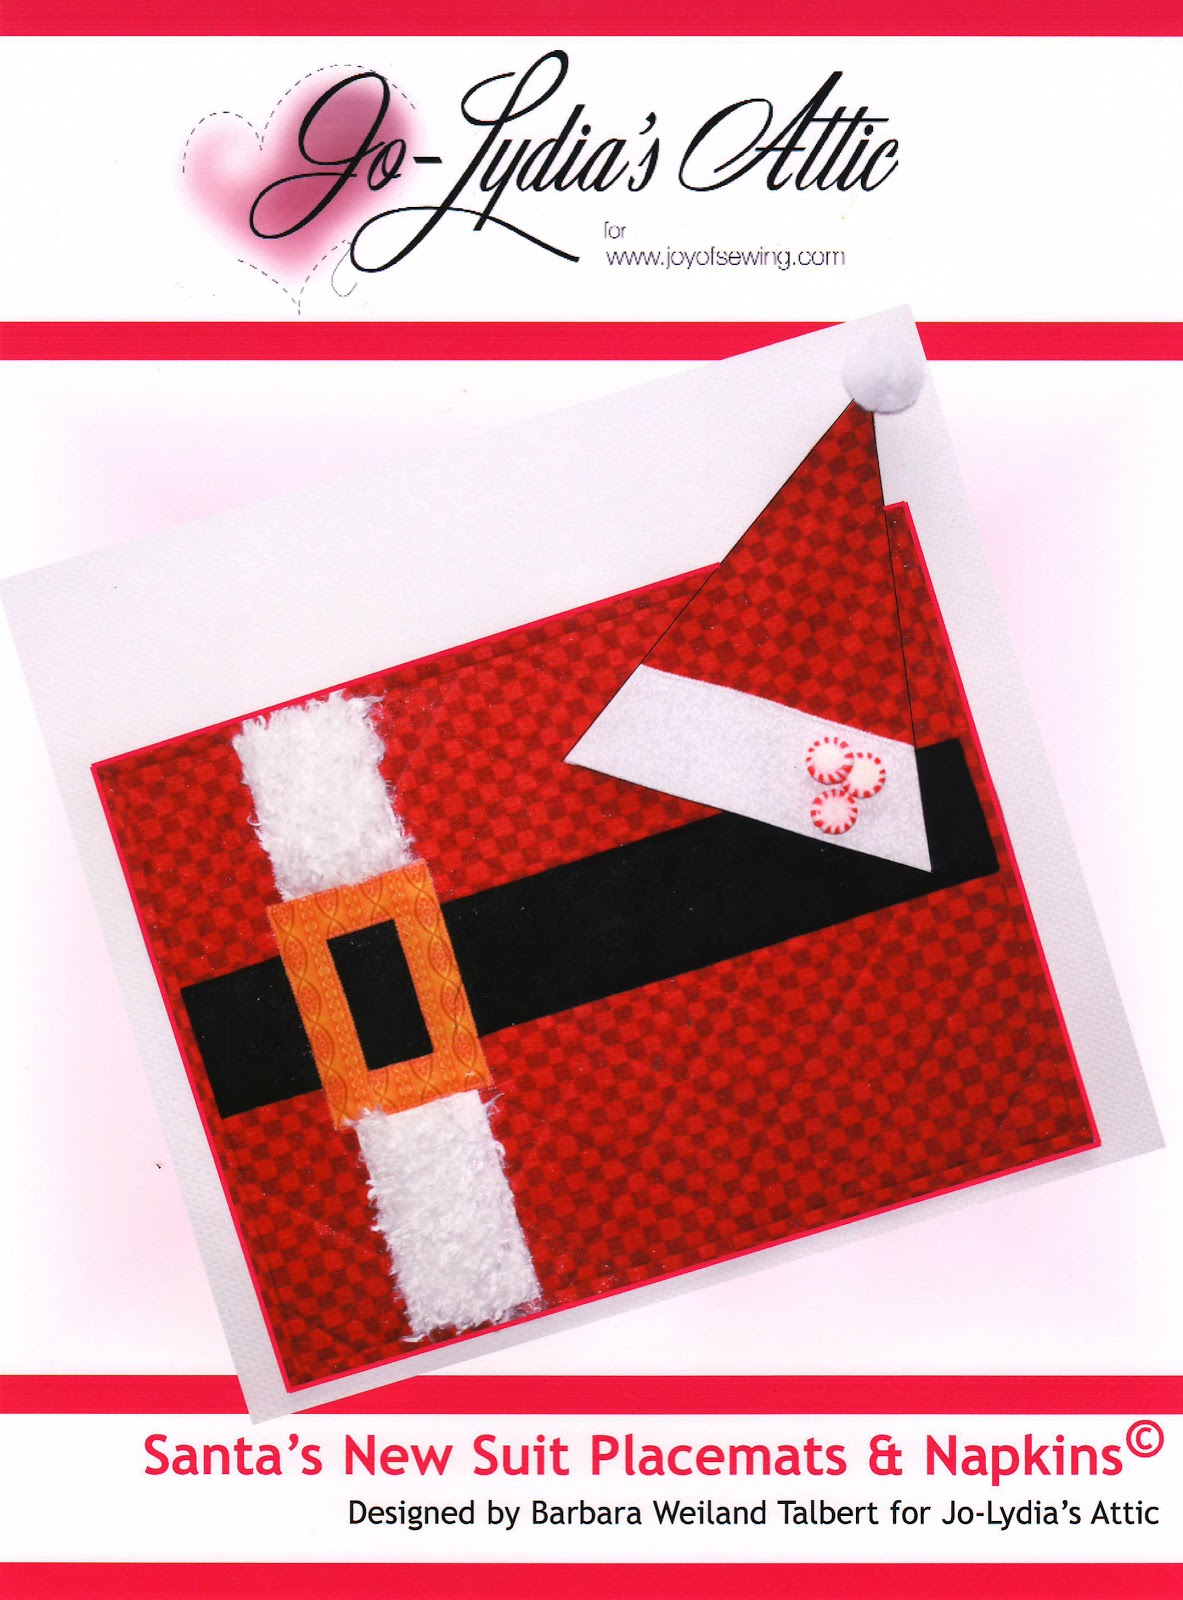
to start your holiday sewing. And, speaking of presents, why not stitch up a set of my placemats, Presently Wrapped, too? The napkin is folded to form the bow on these easy-to-sew mats. Or, if you love Santa as much as I do, check out Santa's New Suit placemats with a napkin designed to look like his hat.


And, if you're looking for an easy Christmas wall hanging to deck your holiday halls, I think you'll love A Heartfelt Christmas. It features easy piecing in the background and fusible applique. You can add embellishments to the tree if you wish for a truly one-of-a-kind tree!

These projects will keep you busy with holiday sewing and they're easy so you're sure to get them done in plenty of time for Christmas...if you start now.

Until next time,
Happy Holiday Stitching
Barbara

Sunday, January 8, 2012

The Santa Chronicles: Part Six

Santa is finally dressed. We're down to the nitty gritty finishing details.

The biggest remaining challenge was deciding how to finish the bottom of Santa's body and how to stabilize his body in his sitting position. Thanks to my handy husband, I have a custom-made platform with a dowel that he made to fit inside the tube in Santa's body. The dowel is securely bolted to the platform, which I painted with black acrylic paint and finished with a coat of Dull-Cote Lacquer. It fits inside the cardboard tube in Santa's body with just a bit of "wiggle room."


The bottom of the platform was left unfinished so I could use a permanent marking pen to "sign" my work.


As for the bottom of the body, I had to find a way to encase the fiberfill. I cut a piece of lightweight faux suede and sewed it to the seamline around the bottom edge of the body, encasing the seam allowance and the upper edge of the gathered legs. That covered the hole in the tube. I felt for the tube edges and marked them with chalk. Then working from the center of the circle out, I carefully cut pie-shaped wedges, ending at the chalk mark. To hide the wedges, I put glue in between the fiberfill and the outside of the tube and then tucked the wedges into the glue and allowed to dry. The suede is nonwoven so it won't ravel. Another problem solved!

 My husband suggested I glue the dowel inside the tube, but instead, I used push pins through the upper legs and into the wooden base to secure Santa. I may decide to go the glue route later.


After I signed the base, I realized that I forgot to add the name of my finished Santa, so I designed a fabric label to sew to Santa's body under his jacket. I adapted a Christmas card design from my Microsoft Publisher program and inserted a photo of Santa's head. I added pertinent details, including his name, "Santa in Toyland." I printed the label on my inkjet printer, on specially treated fabric for the purpose.

You can order this fabric for inkjet printing  from www.electricquilt.com.


After trimming the label, leaving 1/4"-wide turn-under allowances on all four edges, I turned the edges and slipstitched the label to Santa's back underneath his jacket. In retrospect, it would have been easier to do this before sewing Santa's jacket to his body--but I hadn't named him yet. Usually names come easily, but this one didn't come to me until after I added the bag of toys (see below), so I couldn't have made the label anyway. I think it's a nice touch. How I love what the electronic age has made possible when it comes to creativity.


To finish up, I added a few embellishments to Santa—silver star buttons on his boots and little plastic wreaths from my button box on his mittens. I also tacked the mitten in place at the thumb joint to keep it in place.


Santa also needed a sack full of toys, so I cut one from black silk scrap and stitched it up, adding a plaid flannel casing with ribbon at the top. I stuffed the bag with a little polyfil fiber and drew up the ribbon drawsting. Then I tucked in a vintage toy soldier, a little tin toy locomotive, and a small teddy bear, all of which I had purchased in Missoula when I learned to sculpt my Santa head in 1999. After adjusting the ribbon to secure the toys (I didn't glue them), I tied it in a bow. I tacked I brought Santa's left arm forward and tacked his sleeve to his jacket. The bag of toys sits just in front of it.


I also used a few discreet stitches to secure Santa's right arm to his jacket in the desired position with a  and then tucked a small bisque doll, a Swiss miss, into the crook of that arm. (Her feet are tucked behind his arm in this shot (they slipped out for some of the photos I've used). I purchased the little doll in Switzerland in 2006 as a memento from my Bernina trip. She is secured to Santa's jacket with several small safety pins inside her clothing.


And now, my completed Santa is ready for his big "reveal." Drum roll please!

First, here's a closeup of his sweet face!


And, here he is in a casual mood! His soft legs can be "posed." I've also placed his left mitten on his leg. Note his spiffy belt made from a scrap of Ultrasuede and a silver buckle I found in my button box. It's been such fun to use up treasures and leftovers in my collection. Also note that I put a little polyfil fiber in his hat to give it a bit of "oomph," making it easy to put in the desired position.


And here he is in all his finery, my  finished "Santa in Toyland!"


I am so pleased with my Santa, and so proud of myself for figuring out how to finish him, all on my own, step-by-step, even it did take 13 years to do so. All things in their time, right? It took about 3 weeks for the problem-solving and execution to finish Santa, but it was well worth it, don't you think? I don't know if I'll ever sculpt another Santa head, but I certainly learned a lot and have great respect for the Santa and doll sculptors out there and appreciation of how much love and energy goes into a project like this one! Whatever they charge isn't enough. My Santa is a priceless heirloom to hand down in my family.

In some ways, I'm sorry to get to the end of this story--I had such a good time with this project. It was one of my "round to its." My goal this year is to get around to finishing my "round to its." There are several on my list and is this one has been checked off the list!

The End


The Santa Chronicles: Part Five


Santa is ready for a bright red, fur-trimmed jacket and matching hat. The fabric choice revealed itself quickly. Several years ago I bought a boiled wool jacket at my favorite outlet for $20. It fit pretty well and was trimmed with loopy red yarn around the neckline, down the front, and around the cuffs. I couldn't pass it up because the fabric was worth more than the price. However, every time I put it on, I felt like a clown. Removing the trim didn't help—I just don't wear true reds very well. I took the jacket apart by cutting along the seamlines—no need to take time removing the stitches—and thought I might fashion Christmas stockings from the pieces. That didn't happen.

While searching my stash for red velvet, it dawned on me that the jacket pieces were the perfect choice for Santa's costume! First I had to draft a pattern for the jacket. The only way I knew to draft a jacket pattern was to place Santa on paper and trace around his general torso shape, then draw oversize shapes for the jacket front and back, based on my tracing and my knowledge of basic pattern shapes. I drew the shapes on my favorite pattern-fitting tissue, gridded Perfect Pattern Paper by Pati Palmer and available at www.palmerpletsch.com. I also backed the paper with her Perfect Fuse sheer white knit fusible interfacing to make the paper more like fabric so I could pin-fit it to Santa's shape.

These are the shapes I used for the first pin fitting. Notice how the shoulder and side seams are pinned with the pins parallel to the stitching line for fitting.

I tried the pinned jacket/front back on Santa and then moved the pins until the pattern was a pretty good fit. As I worked, I trimmed away excess tissue around the neckline. Because I was using boiled wool, which doesn't ravel, and because there would be fur trim and Santa's hair and beard would cover the neckline, there was no need for a neckline or front edge seam allowance on the pieces. I allowed for an overlap at the center front, plus 1/4"-wide seam allowances at the shoulders, side seams, and center back and the cut away any excess tissue in those areas. I also adjusted the pattern so the pieces were 3/4" longer than Santa's body because by that time, my husband had made a platform for Santa from 3/4" plywood. You'll see that later.  There was no need for a hem allowance at the bottom because the fabric doesn't ravel.

Using the adjusted pattern pieces, I cut two fronts and two backs. Then I machine-basted the pieces together, ready for the fitting.

I tried the jacket on Santa wrong side out , so I could pin in any necessary adjustments. 

Because my Santa has sloping shoulders, I fashioned multi-layered shoulder pads from scraps of the boiled wool and fit them inside temporarily.


After finalizing the shoulder and side seams, I permanently stitched the shoulders and center back seams and trimmed them to 1/4" wherever necessary. They were pressed open. I marked the side seam stitching line, trimmed the seam allowances to 1/4" and then removed the basting so I could use the  armhole as a guide for drafting a sleeve pattern. I made the pattern plenty large and then cut it from the boiled wool.

After several attempts at fitting the sleeve cap into the armhole, cutting the cap flatter and flatter until it fit the armhole curve, I set the sleeve into the open armhole, like you do for a man's shirt. Then it was a simple matter to stitch the sleeve underarm and side seam in one step. Next, I tacked the little shoulder pads in place.

As I did for the boots, I cut strips of fake fur, stitched them into tubes and then sewed them to the neckline, the wrist edge of each sleeve, and the left front edge of the jacket. I also made little patch pockets for the jacket and stitched them in place.


When I tried the finished jacket on Santa, the back was just too big, so I pinned in and then stitched darts to get rid of some of the excess fabric. Also note that Santa has a belt—made from a scrap of Ultrasuede and a silver buckle from my button box.

To complete the jacket, I sewed the right front edge to Santa's body, followed by the overlapping left front.


Before I could fashion Santa's hat, his wig had to be glued in place. I used the Fast Grab Tacky glue and coated his head and the inside of the wig with it. Once positioned, I pressed down firmly to make sure it was adhered all over and set Santa to dry while I worked on his hat. It was the easiest part of the process. I cut two large triangles from the remaining boiled wool, basted them together, and turned up a wide hem that allowed for a turned-up brim. I adjusted the fit, then permanently stitched the seams and the hem and trimmed it with a  fur tube—on the turned-up brim.  Next, I fashioned a ball of fur for the tip of the hat and sewed it in place.

 Keeping the hat in place posed a challenge as I didn't want to glue it onto the mohair wig. Instead, I used small safety pins in several locations underneath the brim to keep it in place by catching some of the mohair.

Now that Santa was completely clothed, I could attach his beard with the tacky white glue. I positioned and glued only the section on the chin area and allowed it to dry thoroughly, then attached the sides in the same manner. The Fast Grab glue was a lifesaver through the entire process of assembling Santa.


I'll keep the completely dressed and finished Santa a secret until the final post, which is about the finishing touches, toys, stand, and label.


To be continued…..


The Santa Chronicles: Part Four


A quick note: I just noticed that in the previous Santa Chronicles posts, I said I decided to finish both of my Santas—the little one from a kit, and the head I sculpted in 1999--in 2010. That was a typo. I really just did the work on both Santas in 2011 and finished the large one on January 4, 2012!

Now Santa needs legs and boots! As indicated in an earlier post, I had removed the legs from the muslin doll skin and set them aside. After stuffing the foot and leg with polyfil, the next step was to create a pattern for his boots. First, I traced around the foot on paper, then added generous seam allowances all around and made the boot fairly tall so there would be plenty of room to adjust the fit and the final length later.


I used the rough pattern to cut two boot pieces from scrap fabric, then pin-fit the boot around the foot.After pin fitting, I drew stitching lines along the pins, removed the pins and then machine-basted the pieces together.

Then I tried the boot on the foot (inside out) to check and adjust the fit. When I was happy with the results, I trimmed the seam allowances to an even 1/4" all around and took the trial boot apart to use as my pattern.

I cut the boot pieces from the same soft black knit I used for the mittens. After stitching the seams and clipping the curve in the front of each boot for easier turning and smooth shaping, the boots were ready to turn right side out, but not yet ready to slip on Santa's feet.

The stuffed foot actually has a flat bottom, making it three-dimensional, but my boot was only 2-dimensional, requiring a firm shape inside the boot so the bottom of the boot would be firm and flat on the bottom. Using the bottom shape of the stuffed foot as a guide, I cut boot inserts from scrap mat board in my craft supply stash, shaping them like the bottom of the foot. These were tucked into the boots before putting the boots on the legs. The shaping took a bit of experimentation—I cut the pieces oversize and then trimmed as needed after trying them on the feet. It helped that the boot fabric was knit, making it easier to shape the boot to the insert too. This idea worked like a charm to create a smooth, flat-bottomed, more realistic-looking boot and foot.

Then for a touch of realism, I cut soles from scrap leather in my stash and glued one to the bottom of each booth with the tacky glue.

At this point, I decided how tall I wanted the boots, and cut off the excess boot and muslin leg as I had decided to make the upper portion of the leg/pant section the way it was constructed for Nicholas Little—with fabric and just a bit of stuffing. See how well the boots stand all by themselves?

In order to attach the boots to the upper legs, I had to create a "knob." This was accomplished by hand basting 1/2" below the cut edge of each boot and drawing up the gathers. After securing with stitches, I was ready for the pants/legs.

Because the legs would be soft, with a minimum of stuffing, I needed a soft fabric. Out came the box of flannel scraps. The black-and-red lumberjack check called to me. To make the legs, I cut a rectangle of a length that would finish off to the desired length of the leg and the desired fullness--just a visual guess. I included 1/4"-wide seam allowances all around the rectangle. I sewed each rectangle into a long tube, pressed the seam open, and then hand-basted around one end, 1/4" from the raw edge so I could draw up the gathers around the "boot knob" with right sides together, and sew it in place. I was careful to position the seam in the leg at the back of the boot.

Next came the addition of the white fake fur. I made "tubes" of the fur, turned them right side out and stitched them to the boots along both edges. A handful of polyfil was placed inside each leg for a little added dimension.
 

Finally, I placed the upper raw edges of each leg together with the seam in the center back and hand-basted through both layers so I could gather the legs before attaching them to the seam allowance along the front of Santa's body. I pinned them in place, adjusting the gathers as desired, and then stitched them in place. Isn't he just the cutest little guy? I think I'm falling in love!

Now Santa just needs his hat and jacket—and a bag of toys.

To be continued….


Saturday, January 7, 2012

The Santa Chronicles: Part Three

Whew! Santa has a mustache, eyebrows, and a body with arms attached. His mittens are done, so what's next?

While I continued to ponder how he would be attached to a base, I decided to attempt wig making, using the curly mohair I had used for eyebrows and mustache. But, I didn't know where to start so I looked online for some basic directions—and then modified them as I went along. First, I watched a video tutorial online at http://www.dollmakersdream.com/Doll-wig-video-tutorial.html. It was quite good. This site has lots of free tutorials on dollmaking. Another site with excellent wig making visuals is http://www.fantasydollsbyd.com/New_page_72.htm. I didn't find this until after I made my wig, but the directions are quite similar to those I found first. In a nutshell, this is what I did:

1. Covered the head with plastic wrap and secured with a rubber band under Santa's chin.

2. Wrapped the head with a lightweight mesh-like fabric and secured it with a rubber band.

3. Drew the desired hairline on the fabric.

4. Coated the fabric with Tacky white fabric glue, using a small sponge paintbrush and allowed it to dry thoroughly overnight. The results feel a little rubbery and have a slightly opaque white appearance.

5. Peeled the wig away and checked to make sure it was totally dry. It was and felt a bit "rubbery." (If still damp, allow to dry thoroughly.)

6. Trimmed away the excess glue-coated fabric along the drawn hairline and then replaced the wig cap on Santa's head, over the plastic wrap. Since it didn't fit snugly, I pinned in a couple of "darts," then removed the cap and stitched them on the sewing machine before replacing it

7. Beginning in the back at the lower edge of the cap, I added small clumps of mohair and glued them in place with the tacky glue. I continued adding clumps in rows around the head from the center back to the sides. The top and front of the wig were tricky—I had to play with the positioning and the info on the video tutorial was particularly helpful. You just have to play with the clump positioning until you get it right. Allow to dry thoroutly and the wig is done! All in all, I was really pleased with the results. The first photo is shot from the inside of the finished wig, the second is a closeup of the interior, and the third is the finished wig from the right side.


For step 7, I actually grasped small clumps of mohair, which had been shorn from the goat, looked for the cut end and fluffed the strands a bit from the cut end down. Then I grouped several small clumps together and stitched them together just below the cut ends, backstitching twice (see the photo). Then I glued the stitched end to the wig cap, beginning at the back and working to the sides, following the hairline.


Next, for the beard. I couldn't find any online help, but having made a beard for the small Santa discussed in Part One, I improvised. I simply cut a piece of the same fabric I used for the wig cap, shaping it to fit under Santa's mouth over his chin and then up to the bottom of his ears. (You may need to shape it with a dart so it will fit smoothly, as I did.) It wasn't very wide—maybe an inch at most, but there was room for attaching 2 or 3 rows of mohair clumps. I was able to position and stitch the clumps in place since the fabric wasn't covered with glue like the wig cap was. I started with clumps at the lower edge of the fabric shape. For the uppermost row, I allowed about 1/2" of the mohair to extend above the edge, then flipped it to the back and glued the ends in place.


Here's Santa with his finished wig—but it's not yet attached. I waited to attach both the wig and the beard until the clothes were made and attached. Otherwise, it would have been in the way of my work!

And here's a close-up so you can see his eyelashes. 

To be continued!