Showing posts with label quilted. Show all posts

Tuesday, July 19, 2016

Zoo Babies Quilted Wall Hanging Pattern


Zoo Babies Quilted Wall Hanging Pattern
My newest quilt pattern is now available at www.craftsy.com. This darling quilt is perfect for a zoo-themed nursery or child's room, complete with nine of the most popular animals at the zoo. Meet Ellie Elephant, and Lucas the Lion, along with other favorites, including Penny Penguin and Molly Monkey, all done up in easy fusible machine applique. Although there are lots of pieces for each animal, their size is deceiving in the quilt illustration, since the blocks finish at 9" square within the sashed quilt top. Make it to use as a play mat or as a wall hanging and help baby learn all about the animals in the zoo...use the blocks to teach them animal names and colors. Colorful sashing and cornerstones make the blocks pop in a simple but easy setting. Nine animals are featured in the quilt pattern, which is available for sale as a downloadable PDF pattern at www.craftsy.com AND, a tenth, interchangeable block...Zachary Zebra, is available as a FREE download, also at Craftsy. Easy-to-trace, full-size templates are included for each animal in the patterns.
Zach the Zehra FREE PDF Download


Ellie Elephant

Jerry Giraffe

Harry Hippo

Lucas Lion


Polly Panda

Penny Penguin

Ruthie Rhino
Molly Monkey


Til next time, keep smiling and sewing,
Barbara

Tuesday, May 10, 2016

At Long Last My New Pattern...The Bold and Beautiful Quilted Tote Bag


From March 2015 until now May 2016), I have been in a long process of personal transition and change. My art and sewing projects were set aside for more than a year while I moved twice and finally resettled in Longmont, Colorado. I'm home again in Colorado, after all my moves across the US for my career, and it's lovely to be near my family and participate in family activities whenever I can.

Today, I'm happy to introduce my first new pattern in over a year. The Bold and Beautiful Quilted Tote Bag has finally made its debut at www.craftsy.com, where I sell my tote, accessory, and quilting patterns online as PDF downloads.


Just as I went through major transitions, this pattern did too. It started out as an entirely different shape, but when I couldn't seem to get my first idea to work last summer, I put the pieces aside for another day. After I settled in my new apartment in February and my sewing room was "open for business," I found the time to rethink the design. The second design didn't work either, so out came the seam ripper. The third time was a charm, as they say!
I'm really pleased with the final design and hope you will enjoy making your own version. The tote is made of fabric I quilted myself. That's become one of my trademarks, since I can't seem to find double-layer pre-quilted fabric that I like. And, because you can choose two fabrics you love instead of settling for what's available, the resulting tote bag is truly one-of-kind, expressing your personality and your personal color palette.The bag pieces are cut first, then quilted and trimmed, making it easy to quilt them before assembling the bag..

The tote has contrasting front and back shaped panels that hold the contrasting pockets in place. The panel and the upper edges of the pockets have a bound-edge finish. The wider binding at the upper edge of the finished bag also holds a zip-top panel in place inside the tote. The panel unzips so you can drop it down into the bag when you want to use it with an open top.

The roomy tote will stand up when you place it on a flat surface, but when you unload it, it lies flat due to the hidden tuck that creates a non-traditional boxed bottom, which you can see in the photo below. I love this feature for easy storage and also because it is easy to pack into a suitcase on my travels...to tote home treasures!


There are also two divided pockets on the inside for stashing small items, including your cell phone.
The straps appear to have bound edges, but the faux binding is created by a really simple flat sewing method. For a truly polished finish the side and bottom seams are bound inside the finished tote.

I hope you'll find two fabrics you love to make this tote your own. You can purchase and download the pattern at www.craftsy.com

Until next time, keep sewing and smiling,
Barbara

Tuesday, December 9, 2014

Chain of Hearts Baby Quilt


Chains of Love

A new baby is always a celebration of love in our family. My newest Grand-Niece, Ella Rose, arrived in October 2014 so I've spent a few weeks creating a new quilt for her and a pattern for you to create quilts for the new babies in your life! Here's Chain of Hearts, the newest "baby" in my pattern store.
http://www.craftsy.com/pattern/quilting/home-decor/chain-of-hearts-baby-quilt/124154

I did the basic design a few years ago in my Electric Quilt software but never used it, so I checked there first for possible candidates It's nice as a lap quilt for cuddling and rocking, or you can also use it as a wall hanging in baby's room---just add a hanging sleeve. 

Two different 12" blocks alternate across the surface of this sugary sweet quilt, creating chains of love for little Ella. I used pink polka dots on white for the background print that the hearts float across, but a pastel tone-on-tone print or one with a small motif would work, too. If the baby is boy, use a medium blue for the large hearts and scraps from your stash to make a lively blue-and-white version, instead. Substitute red for the pieces of the large heart and use blue scraps on white to turn this into a Fourth of July wall hanging.

You'll make two different heart blocks (Heart and Heart Chain), which were carefully designed and colored to create the chains and float on the background. The piecing directions are arranged so that you can chain-piece the required units wherever possible. The 12-page pattern includes colorful step-by-step illustrations, so you can't go wrong. And, you make the blocks in two sets to keep things organized.

Make more blocks and you can increase this design to any size you want.

Any intermediate quilter will find this an easy quilt to make and a confident beginner who has perfected the 1/4" seam could make it too. Accuracy is the key when blocks have lots of seams!


Like all of my quilt and tote bag patterns, you'll find this quilt in my pattern store at www.craftsy.com


http://www.craftsy.com/pattern/quilting/home-decor/building-blocks-quilt/1995

Until next time
Keep sewing and smiling,  And Happy Holidays, 2014!

Tuesday, November 4, 2014

Sewing Again...Two New Patterns

I've been really engaged in on-line art classes all year, but I returned to my machine in October to stitch up two new bag patterns. Both of them are available in my pattern store at Craftsy.com as downloadable PDFs...and one of them is even FREE!

Here's my new "Put a Bow On It Quilted Bag," designed specifically for quilted double-faced fabrics. Since those are sometimes difficult to find in prints and colors you love, I've also included directions in this pattern for quilting your own fabrics to make a truly one-of-a-kind bag.

I love the heart-shaped opening edge with a a magnetic snap closure, as well as the sturdy bottom, made so with bias-bound edges and an inside bottom support that you can remove and clean separately or when you need to launder your bag.


The outside pocket on the back is large enough for most cell phones...or for anything else you might want to tuck in it. On the underside of that part of the bag, there's a large divided pocket. When you stitch the outside pocket in place, it automatically divides the inside pocket.


All of the edges are finished inside and out. The binding on the bow is actually lining, cut extra large so it will wrap to the right side to create self-binding that isn't as bulky as double-layer binding used on other edges in the bag. That way, it's easier to draw up the gathering at the center of the bow--less bulky!

 Here's the link that will take you right to the pattern purchase page for Put a Bow on It Quilted Bag: http://www.craftsy.com/pattern/quilting/accessory/put-a-bow-on-it-quilted-bag/119550


Now for the FREE Pattern...The Quilted Jeans Tote


To make this fun tote, salvage an old and worn pair of your jeans (adult size with lots of usable leg below worn knee area). Or, purchase an inexpensive pair at your favorite thrift shop. 
Hanging pocket inside finished tote

Use the existing pockets for the exterior pocket and for a hanging pocket on the inside--for your phone and other small essentials.

This tote is the perfect size if you prefer a small purse or it makes a great book bag to carry your favorite book or e-reader. It's also a nice size for a bag for your tween or teen. 

I rummaged through my husband's discarded jeans to find a pair with good legs below the knees to make my bag. You could also use a new pair of jeans that you find on sale at one of your favorite discount clothing stores. Look for ones that don't have any Lycra content...the bag doesn't need to stretch
.

This pattern is FREE for downloading as a PDF at the following link: http://www.craftsy.com/pattern/quilting/accessory/the-quilted-jeans-tote/117080

I hope you'll check out both patterns, along with all the other tote, accessory, and quilt patterns that are available in my Craftsy pattern store.

Until next time, keep sewing and smiling!
Barbara

Friday, May 30, 2014

Travel On...With Quilted Tote Bags and More

It's that time again to plan your summer travels and if you are thinking of stitching up a travel bag or two, you'll find several perfect patterns in my pattern store at www.crafsty.com. One of my travel bag patterns is selling up a storm right now. My Quilted Travel Tote is a wonderful bag tote with lots of room and plenty of pockets and is a wonderful carry-on bag and it's my topseller right now. It's designed so you can use it as an open-top tote, too. When you unzip, the zipper panel drops down inside. One of the outside pockets also has hidden zipper for security and there's an inside zipped pocket too! Directions are included for quilting your own fabric so you can make this bag reflect your own taste rather than settling for what's available in quilted double-sided fabric.

The Terrific Travel Tote

For a similarly styled travel tote made from unquilted fabric, check out The Terrific Travel Tote. It's really lightweight when sewn in outdoor fabric, or super stylish in tapestry or a decorator print like the one shown on the pattern cover. It has the same pockets and zip-top as the Quilted Travel Tote, making it a lighter version of the quilted one. Great to fold flat and pack in your baggage and then to tote all your goodies home from your trip.

It's Beach Time!

Travel to the beach in style and comfort with my Sew 'n' Go BeachMat Tote & Pillow. Unzip it at the sides and out it folds to a quilted mat. There's a matching pillow that fits inside the zipped tote for your comfort, whether you're lounging in the sand or poolside at your hotel. And there's plenty of room for other beachside accouterments. An outside pocket is perfect for small items!

Get Organized!

Use the three small bags in my latest pattern to pack and organize small items in your carry-on or your sewing tools for sewing and quilting classes. The Iron Caddy opens to reveal an insulated pressing mat that's the perfect size to keep by your sewing machine for quick pressing jobs with your mini iron or tacking iron.

Carry Me Tote with Handles

Ditty Bag

Iron Caddy /Pressing Mat
Pressing Mat with Mini-Iron
 

Happy Summer Sewing...

And remember that almost any tote bag you make can double as a travel companion. Check out my other tote bag designs and my quilt and other patterns in my Craftsy pattern store at:http://www.craftsy.com/user/153303/pattern-store

Have fun sewing for your travel time and keep on sewing and smiling!
Until next time,
Barbara


Thursday, May 15, 2014

A New Bag Pattern...Finally!

It's been a long time since I made a new bag pattern...and it took me a long time to finish this one. Too many distractions, including a vacation to Maui (poor me), a trip to Colorado for Easter with my Mom and family, illness, and now trying to find an Adult Family Care home for my husband's mom, who will be 100 in July! She fell and cracked ribs and can no longer live in Assisted Living, so the search is on for home that will be a good fit. I've also been taking a year-long mixed media art class, which has absorbed lots of time and revealed that I have more artistic talent then I every allowed myself to realize. I'll share some of that work in another upcoming post, along with a story about a very young Canadian girl who is winning quilting awards!!

So, back to my pattern. I've been wanting to stitch up some small bags for organizing sewing tools and handwork, and an iron caddy that would work for a craft-tacking iron as well as for packing my flat iron when on the go. The new pattern, Quilted  Sewing and Travel Organizers fills the bill. As with all of my patterns, this PDF pattern is available in my Craftsy pattern store at:
http://www.craftsy.com/user/153303/pattern-store
Quilted Sewing and Travel Organizer Bags

 Use this trio of quilted bags to stash your hand-sewing tools and craft iron so you can grab them and go when you're headed to sewing class or  appointments where you may have a little time for handwork. All three bags are made from quilted double-faced fabric and have pretty ribbon tassel pulls attached to the zipper pulls. All require a coil separating zipper--which facilitates bag construction and makes it possible to open the iron caddy to make it into a pressing pad. Here's the scoop on the three bags included in the pattern.

Ditty Bag

Ditty Bag

Finished Size: 2" x 5" x 7"
This little bag is super-quick to sew; the separating zipper is the key to making it easy to construct. It's the perfect size for your scissors, needles, thimble, measuring gauge, and any other small tools you want to keep together and close at hand. Use it when you travel to organize charger cords or other small items in your suitcase or carry-on.
Carry Me Tote

Carry Me Tote with Handles

Finished Size: 13-1/2" x 7" x 2-1/2"
This little bag is the perfect place to tuck your handwork, plus the Ditty Bag with your hand-sewing tools. It opens wide, making it easy to pack and then find what you've tucked inside. You can tuck your mini-iron in too, for sewing class or to use when staying in a hotel room. The tote is also a great travel companion for organizing small items in your carry-on or checked luggage.


Insulated Iron Caddy/Pressing Mat

Finished Size: 5" x 14" closed
                         10" x 14" open 

Use this multi-purpose caddy to pack a small craft iron for sewing class or tuck your flat iron and other small hair items  inside when traveling. There's room for other hair items too. Unzip it to reveal a padded pressing mat to keep by your sewing machine and to use at your table during during sewing or quilting classes. It's also good for small touch-up pressing jobs in your hotel room. Lined with silver-coated fabric for ironing boards, the caddy includes a layer of insulated batting too.

           
Insulated Iron Caddy/Pressing Mat


Unzip the Caddy to reveal a pressing mat to use with a craft iron.
Also use with your mini iron at the sewing machine.
Until Next time,

Keep sewing and smiling...and happy travels. Check out my Quilted Traveler's Tote in my Craftsy store, too. It's been on the Craftsy Leader Board this week. As the weather warms, I think lots of people are thinking about upcoming vacations and sewing bags stash their stuff while on the go!

Barbara


Sunday, January 26, 2014

Just for the Yin & the Yang of It...A Mug Rug Set

I Almost Forgot to Post These!

Earlier last year, I started taking Yoga at a wonderful studio in Vancouver, WA. Walking into Shanti (peace) was like coming home to myself, for not only is its staff warm and welcoming, they also provide opportunities to explore your soul purpose, in addition to teaching you how to use your breath to support, understand, and move your body in ways that support you physically and emotionally. I started Yoga on my Dr.'s recommendation to help with chronic low back pain, and it has been immensely helpful.

My experiences at Shanti were a good reminder of Yin and Yang. As I've known and accepted for a long time, life is a field of opposites, both light and dark, and they complement each other. "They are essential to life," as my meditation teacher says and "Life is a dance of light and dark." From darkness comes illumination if we are willing to look for it. The ancient Yin and Yang are symbols for this, and are typically drawn with a circle of the opposite color in the "head" of the paisley motif, showing that light and dark are within each other. Because the two are identically shaped, they nestle into each other, completing the circle of life. For me they are a symbol of learning to be at peace with all that life offers up.
The Yin and the Yang of It Quilted Mug Rugs

For Valentine's day, I substituted a heart in each one, signifying the importance of learning to love all of life--the light and the dark! Then your soul finds peace. As quilted mug rugs, they made the perfect gift for my Yoga instructor, who at the tender age of 35 is one of the wisest women I know! She has blessed me with her powerful presence, her love, and her compassion and continues to do so every week. Blessings to you, dear Heather!

The mug rugs are super easy to sew since there are only two simple shapes to applique with fusible web. I did simple rows of quilting around the shapes, letting them run off the edge as necessary. Sized at just 6" x 9" each, the mug rugs take minimal fabric. You can use them as small wall hangings, too. I'm happy that others like my design--in the past two days, I've sold two of the PDF downloadable patterns for this design in my Craftsy pattern store: http://www.craftsy.com/user/153303/pattern-store

Be sure to check out the other PDF patterns in my Craftsy store. There are mug rugs for many seasons and reasons, plus placemats, table runners, quilts, and tote bags--over 75 in all! Have fun shopping!

Until next time,
Keep on sewing and smiling!
Barbara

Saturday, January 25, 2014

A Valentine's Mug Rug for Friends and Lovers

Here's my latest pattern offering--just in time to sew for Valentine's Day. What fun it would be to use these for a special Valentin'es Day Tea with your best friends! The design is so simple that stitching it up in batches takes no time at all! 

This design features the age-old folk-art symbol--the heart-in- the-hand. 
The "hand" is actually a pretty ruffled glove, trimmed with ruffled lace and ribbon. Fusible appliqué makes this little mug rug a cinch to sew in minutes! Make a set for yourself and several to send as sweetly stitched valentines to show your love for special friends--your love--your family.
Here's My Heart Valentine Mug Rugs
As with all of my patterns, this one is a downloadable PDF, which you can purchase from my Craftsy pattern store at: 
http://www.craftsy.com/user/153303/pattern-store
Happy stitching and Happy Valentine's Day!


Until next time,
Keep sewing and smiling!
Barbara

Saturday, November 16, 2013

Another New Mug Rug Pattern

I just might be addicted--to mug rugs. During the past month, I've designed many and completed 11 patterns. They are such fun to design using Electric Quilt 7, and they're so fast to make--talk about a little piece of instant gratification! I'm pleased to announce that my Turkey Time Quilted Thanksgiving Mug Rug has just joined the holiday parade in my pattern shop at www.craftsy.com.


Because mug rugs remind me of a nice cup of hot coffee, and coffee is always better with a sweet treat, this new pattern also includes two of my favorite harvest-time recipes: Streusel-Topped Pumpkin Pie and Easy Pumpkin Walnut Muffins. So grab your scrap box, search your fat quarters, and stitch up a batch of these fun mug rugs for your holiday table or to give as gifts. Then try one of my favorite recipes for Thanksgiving-time treats. Enjoy!


Until next time,
Keep sewing, quilting, crafting, and smiling!
Barbara

Monday, November 11, 2013

The Trouble with Quilted Mug Rugs...

Just like you can't eat just one potato chip, you can't make just one mug rug. They're fun, cute, easy, and quick to make. I was a little late with Halloween so I bypassed Thanksgiving (for now) and skipped right on to Christmas. With over eight new designs from which to choose, I settled on making my three favorites and have grouped them together in a single pattern. Check out Santa and His Helpers at my craftsy store: http://www.craftsy.com/user/153303/pattern-store

 Santa & His Helpers


If you prefer, the mug rugs can become oversize ornaments or package gift tags by adding a ribbon tie to the upper edge as shown in the photo of Rudy' Red Nose, above right. Or, if you use a muslin backing to cover the batting and the quilting stitches, you can write a holiday message on the back and add other "artsy" embellishments with stamping, doodling, etc. Pop them in envelopes to send to friends who will appreciate your handiwork.

Simply Santa is just that--really simple to stitch up in a hurry. Use poly felt for the beard, mustache, and hat trim and do free-motion quilting in the beard to simulate Santa's curls. For his hat, choose two red fabrics to help differentiate the two pieces. Add a white pompom to the tip of the hat.


Rudy's Red nose, as shown, is an applique enhanced with a flat button. When adding embellishments, make sure they won't interfere with your mug, if you're planning to use these as mug rugs.


Alfie the Elf looks like he's a little unhappy--maybe he's a little overworked! It's all in the shape of the mouth! Make it smaller and turn up the ends a little more when you stitch his mouth for a cheerier demeanor. Flat buttons replace appliques on Alfie's hat and shirt.

All three mug rugs are set up for fusible applique. The pattern includes full-size applique placement guides and reversed images for fusible applique. Use up scraps and cut into your fat quarters for these fun mini quilts. They are wonderful scrap buster projects and give almost instant gratification.

Set yourself up to sew multiples and you'll have a set or two done in no time. Check out the section on Assembly Line at a Glance in the pattern. 

No Time Like the Present...

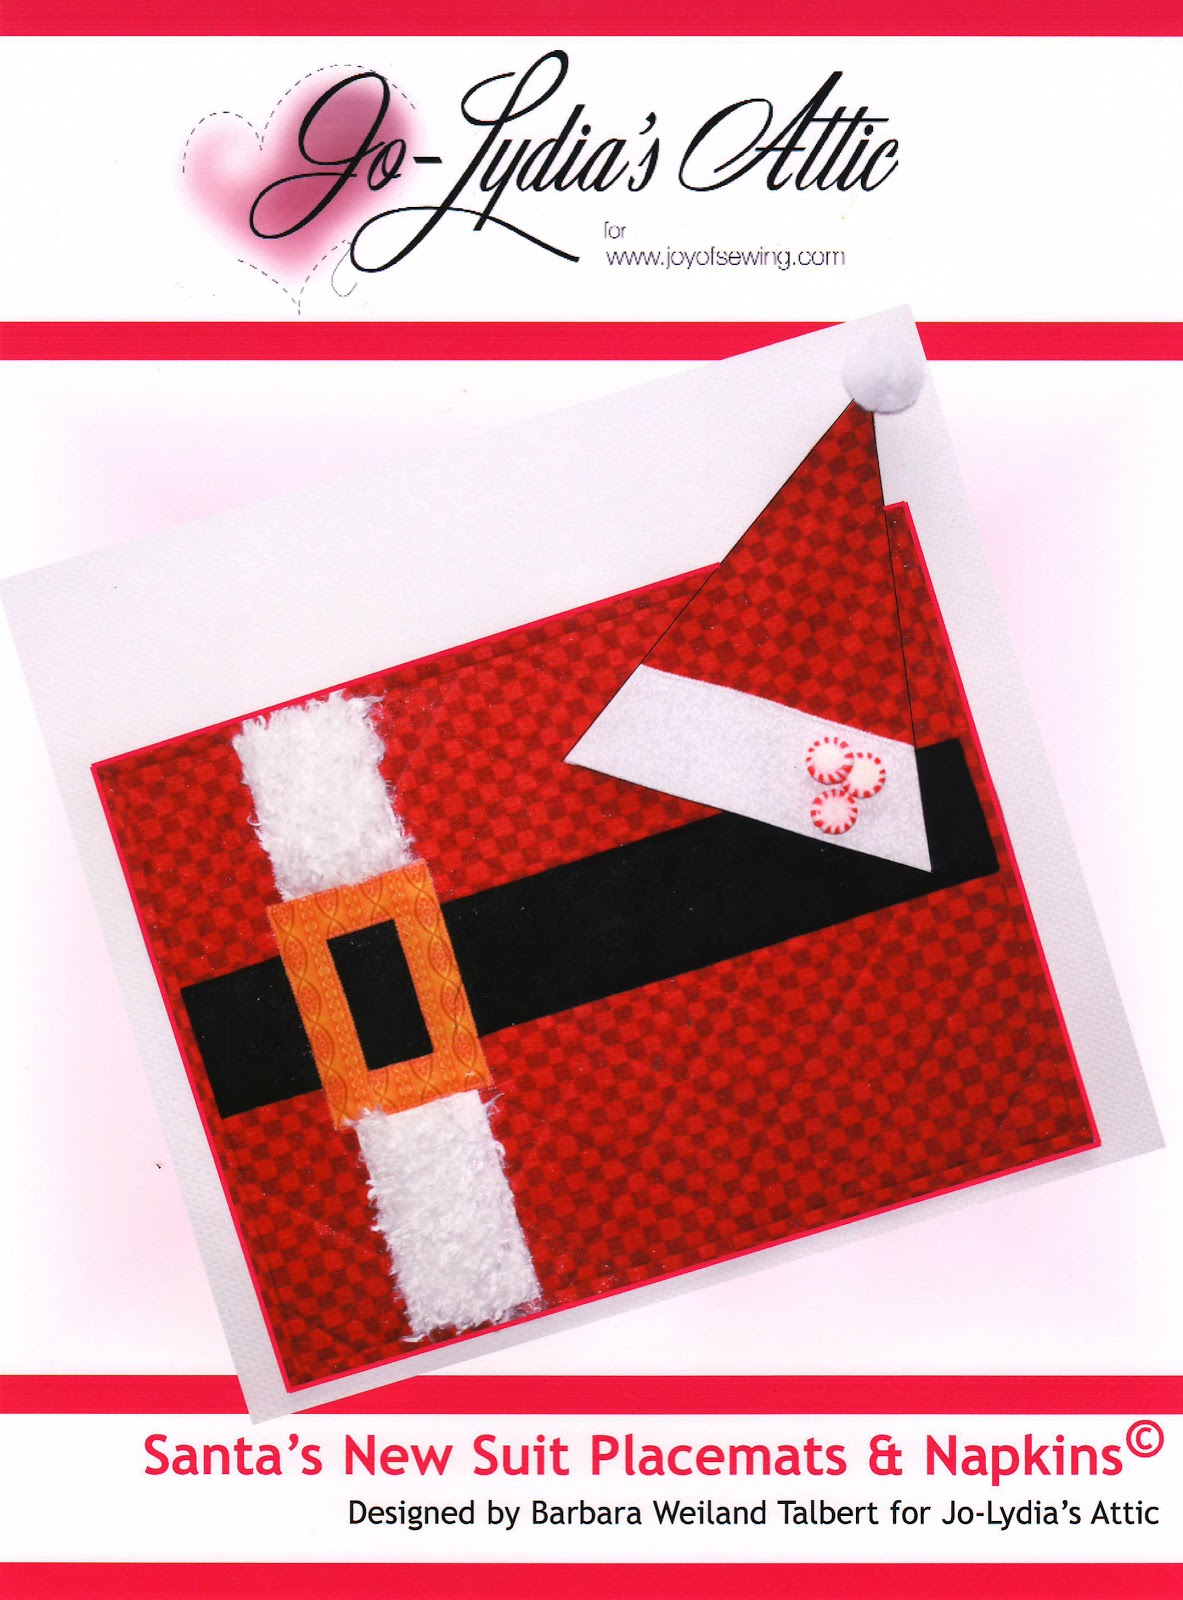
to start your holiday sewing. And, speaking of presents, why not stitch up a set of my placemats, Presently Wrapped, too? The napkin is folded to form the bow on these easy-to-sew mats. Or, if you love Santa as much as I do, check out Santa's New Suit placemats with a napkin designed to look like his hat.


And, if you're looking for an easy Christmas wall hanging to deck your holiday halls, I think you'll love A Heartfelt Christmas. It features easy piecing in the background and fusible applique. You can add embellishments to the tree if you wish for a truly one-of-a-kind tree!

These projects will keep you busy with holiday sewing and they're easy so you're sure to get them done in plenty of time for Christmas...if you start now.

Until next time,
Happy Holiday Stitching
Barbara